Tuesday, November 26, 2013

Lesson Theme: Fall, Squirrels, and Happy Thanksgiving!

Time for me to play blog catch up!  Here are some fun things we did for the fall season!


We read about why leaves change color and made a simple book as a visual retelling aid.

I traced a leaf pattern onto paper and two plastic sheets (on top of it) as well, stapling all together.  The kids colored the leaf outlines on the plastic with green, while the leaf at the bottom reflected fall brilliance of their choice.  Then...


The kids pulled back the first plastic sheet (and green leaf) revealing a little more of the fall color beneath it and practiced explaining about the process of chlorophyll fading as the leaf detaches from the tree.  


They then pulled the final plastic sheet (and green leaf) away, leaving only the brilliant fall colors behind as they explained how a tree stores extra sugar in the leaves and the sun changes that sugar into pigment (which is hidden by the chlorophyll).  Fascinating stuff!   (FYI - there is a bit more to it than just that, but you get the general idea.)

A great book to consider for learning more about the process is "How Do Leaves Change Color?"  (see link below).


This was a writing activity we worked on together.


What would fall be without some fun mini pumpkins to decorate!

Squirrels took center stage for a while as well this season as you'll see below...


We tasted different nuts and graphed our favorites.  The squirrel markers are made of felt (each of us made one and placed it above our favorite nut).  :)


These are some acrylic candle gem acorns (?) that I found on clearance at Michaels.  These were great for sorting and counting activities!


We used REAL nuts to spell words...


create designs....


and make patterns! 


We also used the nuts to play a "finding game".  The kids were the squirrels, and I hid some nuts under the "ground" (a piece of paper).  To find their hidden nuts, the kids would turn over math fact cards, solve the problems, find those numbers on the ground, and dig through (I cut some slits in the paper to help) to find their nuts!  


This was a fun and easy craft we did together.  The kids used their fingerprints to make a squirrel and an acorn (details added with a pen or marker) on a small strip of paper.  I glued thin magnetic strips to the other side (one behind the acorn and one behind the squirrel), and voila.....


A MAGNETIC BOOKMARK!  :)  They turned out so cute - not to mention handy!
(For those unfamiliar with magnetic bookmarks, when you fold them over your page, the magnet snaps together - squirrel on one side and acorn on the other - holding your place on the page.)


This little guy was actually part of another unit but he fit in with squirrels so well (because he is one) that I added him to this post.  This is just a baby sock ( see, you CAN do something with those socks which are missing their matches) I turned into a squirrel puppet by cutting some holes for the fingers to fit through and adding wiggly eyes and a pom pom tail.  Our little friend was part of our reading area and helped the kids by turning pages, listening in, etc.


Last by not least, we made some of these little guys.  I printed out a squirrel picture online and we added felt to the tail to make it soft.  Pom poms would have been SOOO wonderful for this, but I didn't have enough in the right color, so I had to improvise.  They still came out cute though.  :)


What is that crazy stuff sitting in the bowl?!?

Well...it has to do with Thanksgiving.  :)  

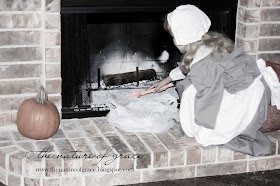
My daughter still remembers when I had her pretend to be a Pilgrim.  She loved it so much that she wanted to do it again this year.  What can I say - it WAS fun (you can see more on that post here)!  So I surprised her yesterday morning with a Pilgrim girl costume and list of chores.  

But what does this have to do with the bowl?!

Well, that was one of our activities for the day - dying some cloth a different color using beets.  The cloth will be a little pinkish reddish washcloth for "Joyful" - a doll we are pretending is the family baby.

What other things did "Humility" (I love giving my kids new names when they pretend to be Pilgrim children) do yesterday?

She helped with dishes, took care of Joyful, cleaned the hearth, helped make "ink" (charred wood, mud, and water mixed together), used a quill and ink to complete some of her schoolwork, helped with laundry, cleaned walls, helped with the animals, helped clean up the kitchen and other rooms, practiced Pilgrim manners at meals, and helped dye cloth!  Whew - busy day, and tomorrow will be another one!  But she loved it!  :)

I leave you with a picture of "Humility" cleaning the hearth in her new Pilgrim attire.  


HAPPY THANKSGIVING!


Wednesday, November 6, 2013

Lesson Theme: Apples!

I know, I know - posting about apples in November?!?  Better late than never, right?  

I think we did this theme in September if that gives you any idea of how far behind I am in posting our thematic activities.   ;)  I believe we also stretched this theme over more than one week.  (I've been doing that with more than one theme lately too which is one reason you may not see items posted every week anymore.  I like to wait until we have finished up a theme before writing about it.)

Are you ready to see a few of the things we did?  Of course you are!

So sit back, relax, and pretend it is September - okay?  ;)


Here is a multi-dimensional chart I made to go along with an apple thematic packet I bought.  This is just an enlarged and embellished version of the chart in the activity pack.  :)  To make the apple, I basically just squished up some red tissue paper and glued it to the middle of my chart.

We tasted several different apples (how can anyone not with the astounding variety out there, right?), and I wrote down describing words the kids came up with for each category.


The kids then chose some words from our large chart and completed the smaller charts that came in the packet.  You can see one example of the small chart in the middle of the picture above.

The packet came with many other fun games, activities, a graph, etc. as well.  We spent a good amount of time just on the items in this packet.  Here is a link if you are interested in purchasing it.


Adjectives came in rather handy for another activity where we took turns hiding different apples inside a bag.  We would write three words that described the hidden apple on a small whiteboard.  The other people would then have a chance to read the words and guess which apple was in the bag.  


Miss A also spent some time using her investigative skills to find the different parts of an apple.


AND we practiced our fractions by reading the book "Apple Fractions" and doing some hands-on fraction work with our own apples.  We used this book last year, and I HIGHLY recommend it.  Not only is it informative, but I think it does a great job of illustrating fractions AND inserts a fun element by depicting little elves working hard at the process of dividing apples into the appropriate number of pieces.  

I was delighted with it last year and found myself delighted with it AGAIN this year (and folks, mathematics is not my thing so if a math book can charm me that much two years in a row - well, let's just say I think it is a worthwhile book to have in a homeschooling library).  There's a link below if you are interested in purchasing your own.


This was one of my favorite activities:  an apple collection book!  I printed out several poems, songs, etc. about apples from a site online, and the kids cut them out and pasted them inside pages of their books.


The cover was made from cardboard (maybe a box of cheddar bunnies?) and painted red.  I used a corrugated cardboard piece for the stem, and we completed the "apple" look with a leaf.

Ah, but perhaps the most fun part was the fuzzy green velvet (ribbon) worm we glued in the book to act as a bookmark - complete with wiggly eyes!  When the worm was not "working",  he could peek his little head out of the hole in the cover.  :)


We read stories about apples and looked at apple recipes.  We then chose a recipe from one of the books and made apple pie.  The picture above was a retelling activity of sorts where my little "chef" explained how we made our apple pie.


Speaking of apple recipes, we also made some of these delicious beauties.


And (in keeping with the charm of "If You Give a Mouse a Cookie") if you bake an apple pie and make caramel apples, chances are you'll need something to drink to go with it!

Happy "belated" September everyone!  :)


Tuesday, October 22, 2013

A Ballerina Ball!

Recently, we arrived at that wonderful time of year again when I must figure out how to throw a fun party for Miss A while trying to stay within a budget.  Actually, it was much easier this year than I thought it would be!

The theme of choice?  A Royal Ballerina Ball.

Knowing how time is a precious commodity for many of us mothers who are the event planners, caterers, bakers, etc. for our families, I thought I would post what I did with some links.  Hopefully, this will provide a shortcut of sorts for like-minded moms on a budget who don't have a lot of time for online searches!  :)  


For starters - we did not have to buy our invitations this year!  We found them FREE along with piles of coordinating party items (also FREE for download) here.

They are cute on their own, but can be embellished as well (which is what we did).  

This wreath is made of feather boa and more tulle (check for sales on spools of it at craft or sewing stores).  

The ballerina hanging in the center is a Christmas ornament (often craft stores like Hobby Lobby will start putting these up halfway through the year AND start having early sales like 40% off)!  :)


Instead of serving a full meal with fourteen little girls - we served cake (homemade and decorated) and ice cream.  The figurine at the top is a miniature doll that I hot glued to a skewer.  

Bonus - if you are careful (try running under hot water), you can remove the figurine from the skewer and it becomes a little extra gift at the end of the party!  This can also be done with Christmas ornaments and it becomes a yearly keepsake - something for her to hang on a Christmas tree each year to remember that year's birthday!


I cut some shiny pink paper and tulle to wrap around water bottles for each girl.  I also used some pink vases I found on clearance and wove long pieces of remaining tulle along the center of the table.   The faux flower petals were another clearance find (I think I found them right after Valentine's).


For our craft, we made ballerina boxes.  What is a ballerina box, you may ask?  Why, a box for putting your ballerina items in, of course (ballet slippers, fancy hair clips, etc)!

I found these pink and purple sparkly boxes at Michaels for only $1 each (I think they are actually school supply boxes)!  I also bought a package of "jewels" for the girls to use when decorating their boxes.  A silver permanent marker worked perfectly for writing the name of each little girl on her chosen box. 


What's a party without a game, right?  I searched and searched for a ready-made Pin the Tutu on the Ballerina pattern or game but failed to find one.  Soooo, I made my own ballerina pattern, and long story short, she is also now available in my TPT store for only $1.50!

The pattern is pieces of the above ballerina which can be cut out and put together on posterboard OR cut out and used to trace around on posterboard or another surface.  The pieces are black and white so each family or birthday girl can decide how she would like to color her ballerina (I also included a blank face template in case someone wanted to make the face differently than the one I drew above).  


The girls also watched some ballet AND practiced ballet moves.  I LOVED the video we bought for this - just the right fun mix!  See link below the post).  

Once the crafts and activities were completed (and food eaten) - the girls settled in to watch a Barbie ballerina movie (we checked with moms beforehand to make sure this one was okay with everyone) and munch on pink-coated popcorn.  


After presents and the movie, it was time for our ballerinas to head home.  We sent them off in royal ballerina style with gifts of "jewels".  Each bag was made to look like a ballerina leotard complete with tulle tutu.


Our parting sign:  

"Thank you for sharing this special day with our prima ballerina.  You are "tutu" kind!

(P.S. - speaking of tutus, one thing we did NOT do but ALMOST did, was to provide tutus for all of the guests.  I found a place on Amazon that sells a dozen for around $16 total!   That is only about $1.33 each!  I posted the link below as well if you are interested.)


Wednesday, September 25, 2013

Lesson Theme: Pets

It has been far too long without a post!  However, family and homeschool are my first calling, and lately they have been holding more claim over my time.  :)  By the way - did I mention we have a new puppy - enough said.  ;)

Miss A has been wanting a pet, and our beetle wasn't cutting it.  After MUCH thought and discussion, we decided to surprise her with a puppy.  But before we told her, I decided to capitalize on the opportunity and do a short unit on pets.  Here are some glimpses from that theme!


We had a brainstorming session to help us figure out what we should know about owning a pet.  We drew a collar around our ideas and "leashed" them to our title.


I wrote some animal names on small cards and dropped them in a clear pocket attached to the front of the "Pet Store".  The kids could choose an animal, draw a picture of it on the card, and add it to our Venn diagram.  Miss A also had to explain why she thought a pet belonged in a certain area on the chart.

BTW - you know you have an ant problem when your child pulls an anteater card out, places it in the "maybe" section of the diagram, and explains how it would help with the ants.  Sigh.


Owning a pet means keeping an eye on them and being responsible!  I let Miss A choose a pet she might like to have, found a picture online for her to color, and told her to keep track of it or it would end up in our "pound" (a clear plastic protector with bars drawn on it with permanent marker).   Yes, I know you don't often see horses at the pound - okay, maybe never - but this was just for fun and to emphasize the idea of watching out for your pet.

To free her pet again, she had to perform some task or chore, etc.  Can you say "extra piano practice"?  ;)


We also made aquariums by creating pictures with beans for sand, some fingerprint fish, and slipping them into our "tanks" - more clear plastic protectors.  

I then made fish food for the kids to feed their fish.   They had to answer the equation, tell me the letter on the fish food card, etc. in order to earn a piece and feed their fish by dropping the food into the tank.


This activity was where I let the kids design a pet (could be real or make believe) and then asked them to write a story (not shown) or a brochure about it... 


Here is one of Miss A's creations.  I give you, the world's first "googl floopr".   You saw it here first, folks!

Miss A made a brochure about her pet in order to inform others about it and to try to convince them to buy it.  I ask you - how could anyone say no to such an interesting creature - and at that price, it's a steal!

Love the eyes and ability to play peek-a-boo!  Too cute!  :)


This was another fish craft we completed.  The "glass" of the aquarium part is a clear plastic plate glued to the paper.  We added beans to the fish and included some tissue paper plants for more of a three dimensional effect as well.


We also enjoyed a bunch of activities from this cute packet.  (This picture shows just a few of the MANY items available in the packet).

Of course, the crowning point of this unit was when we gave the kids an envelope with a message inside letting them know they would be getting a puppy!  :)  I'm SO glad we had our video camera.  :)

And now you know a bit of why I have been MIA lately, and why I might be more so over the next few weeks.  Hey, it isn't easy potty training a child and a puppy at the same time!  ;)


Monday, August 12, 2013

New School Room Reveal & First Days - A New Year of Growth & Change!

Let me preface this by saying - you DO NOT need a classroom to homeschool.  

We have done homeschooling in a room with shared purpose (study), at the kitchen table, in a hotel room, and at a relative's house in cramped quarters.  We were able to homeschool just fine in all of those settings.  

But this year - we were blessed to move into a house where we had a room we could use just for homeschool purposes.  And I was determined to really turn it into a fun place to school and learn!  :)

(If you missed my previous post when I was in the middle of working on the room - you can see some of what it looked like before here.)

Would you like a tour?  I hope so!  

So without further ado, I give you our new homeschool room!

One side of the room contains our morning meeting board and reading center.

Here is the area where the kids work (when they are not camped out on the large pillows we sometimes pull into the room to use when sitting on the floor).  Learning doesn't always have to happen at a table or a desk, you know!   ;)

Here is another side of the room where my desk is and where the kids sometimes come when we work one-on-one.

Here is a wall with an inset that we filled with IKEA cabinets (birthday present for me at my request).  That little side space contains hooks on the side of the cabinets where I hang calendar borders and such out of sight but still handy when needed.

This is a view inside the top cabinets which contain older curriculum, books by season, school items I don't use as much, and craft type stuff.

Here is a close up view of the craft items I was describing.  I made the labels (and others you will see below) and added them to my Back-to-Homeschool activity/school items packet.
Here is another IKEA find where I keep extra school supplies we might need during the year.
I like to plan in advance and it helps me to have things set up where I can drop papers and items we will need on certain days in a specified area as I work on lesson plans.  Then the night before, I just reach in and place the items in the workboxes for the next day and don't have to mess with trying to find everything.  

I have drawers for each day of the week AND a drawer for "Next Week" in case I am really ambitious and already planning for the following week.  ;)


If you open the larger cabinets below, you will find that each side contains a set of workboxes.  One side for Miss A and one side for Mr. J.  (The middle large cabinet contains some teaching items and center stuff).

The cabinet in the picture above is Miss A's.  She has nine workboxes and then space next to each set of three for a fun activity or snack or something else which she can complete at the end of each three workboxes (so after she finishes boxes 1-3, she can have her snack if it is next to those boxes, etc.).

Each child also has a shelf above the workboxes where he/she keeps books and supplies, etc. not being used right then.

I created Miss A's workbox numbers and titles in lime green and pink (of course) and Mr. J's are lime and blue.  These are also now included in the Back-to-Homeschool packet.  :)

(The material I made the pocket chart out of for the workbox numbers above, is also the inspiration for the colors in our room.)
This is a picture of our reading center.  I made the tree out of cardboard from the IKEA boxes and painted it with Miss A.  The "tree swing" shelf is an IKEA spice rack I painted.


The outside of each child's "locker" as my daughter calls them, contains a painted foam board that we use as a bulletin board for each to display work.


Here is our morning board.  I am loving the handprint alphabet and plan to make one for each letter Mr. J studies this year.  Here is a link to a blog with an adorable handprint alphabet!

Why does the board say "September" when it is really August?  Well, the calendar title for September looked more back-to-schoolish, so I just switched it for the picture.


I found these adorable songs for each month of the year at this blog here.  I pinned up a transparent page protector and plan to trade out songs each month!

Another cute thing I added was that I am letting the kids make their own weather cards to put up for the weather of the day.  :)

Here is Miss A's desk (more IKEA).  The kids each have another small "bulletin" board above their desk and another IKEA painted spice rack underneath (I did not bolt this so it could be moved off the desk or to the side as needed).  The little rack contains a pail for supplies and a binder with morning meeting calendar activities inside which we use during our  morning meeting time.  

Each child also has a bug habitat on his/her desk containing caterpillars (each one has a different type) to go along with our back to school theme "A New Year of Growth and Change" (see more about that below). 

I wasn't sure if having the little guys on the desks would be too distracting but it has worked out amazingly well so far!  :)  AND we have our first chrysalis already!


These are another favorite of mine in our new school room!  I loved the crayon initials I would see popping up on Pinterest so much that I decided to make some for my kids.  

I ALSO added a made up definition of their names (like a dictionary - complete with pronunciation guide) below the initial - a definition I came up with based on their characters, etc.  I LOVE how these turned out!
And last, but not least - my little area of the room.  :)  Pretty simple, really.  

I painted the white board frame to go with the bright color theme in the room, and painted a diaper wipes (?) box to house some electronic stuff that had to stay on the desk, but didn't really fit with our color scheme.  I also slipped some of our school cds and some flash cards in the box (for easy access).

There are still some other things I want to do in the room (so some areas are still a bit blank) but decided not to wait to post pics because who knows when I would post if I waited until I had everything done!

So now that you have seen the room - would you like to see our back to school theme and first days?  Of course you would!  ;)

"Welcome to a New Year of Growth and Change!"
(This was our back to school theme.) 

"The Very Hungry Caterpillar" was a perfect companion for the theme, and we started the day with a special breakfast based on that very book.  See the cinnamon rolls with frosting - made to look like the caterpillar?  :)


Next to each child's place setting, I made this little paper where they could record what they ate for breakfast that day.  AND I made little hungry caterpillar masks for them to wear.  :)

It is hard to see - but I poked holes in pieces of the fruit using a straw (can't take credit for that idea - I think that was something I saw on Pinterest long ago), so it would look like a caterpillar had chewed through.

Here are those masks I mentioned above...


After breakfast, the kids went to the new school room and crawled through the hole in the leaf "doorway" to investigate all the fun new changes inside (they had not been allowed in the room the day before, so I could get it set up as a surprise).

They loved the real caterpillars on the desks (inside plastic homes, of course)!  I just couldn't resist the idea once I latched onto the theme - how fun to talk about growing and changing and then see it first hand!  :)


I took this picture so you could see the "WELCOME" part a little better.

Notice the caterpillar munching on the "W".


Here is a picture of my youngest with his back to school sign and caterpillar mask.  I had both kids paint their own signs this year.  

His says "TOT" for Tot School.  It is sideways and out of order, but if you look at it - you should be able to see two T's and an O (and some additional thing he put in there).


Once inside the school room, we found that mischievous Homeschool Elf had already been there and our school supplies were missing!  Lucky for the kids, he left clues behind and a treasure hunt ensued, ending inside a closet where the kids finally found him and the missing supplies.

(I like to wrap some of the supplies up because it is fun for the kids to unwrap something - just adds another layer of excitement to the day).

Here is Homeschool Elf posing next to the first clue he left for the kids earlier in the day.
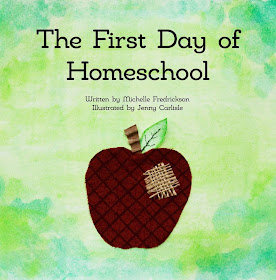
Here is the book we read on our first day!  It contains a page with a pattern for Homeschool Elf which can be copied onto cardstock (the page has a B/W copy and color copy of him) and used to start one's own Homeschool Elf tradition.  :)

If you'd like to read a bit more about this cute story and see some of the inside illustrations, hop on over to this post.  


Yet another activity from the Back-to-Homeschool packet:  goals for the year.  

I just had to post this - I love that her end of the year goal is to be able to "drive".   I'll just slip that one into the memory box!

We also published our own little newspaper (this and other versions also in the Back-to-Homeschool packet) about our first week of school.  Miss A wrote most of the articles, but I made sure Mr. J could contribute as well by including a "Tot Spot" section where he could draw something.  Can you tell what he drew?  Caterpillars!

BTW - for those interested, you can find the whole pack (LOTS of other activities, supply labels, workbox labels in different colors, etc.) here and on sale for only $2.00 through August!


This is one of those gems for homeschooling and classrooms alike because it contains multi-level pattern block puzzles for back to school items.  AND it even has them in both Spanish and English!

I just love the bright colors!  :)  I put out the easier puzzles for Mr. J and gave Miss A the harder ones (where she had to come up with her own way to fill in the puzzles and record the blocks she used). 

FYI - these can even be made into books by stapling several pages together!  They are just awesome for math boxes, a back to school activity, keeping smaller kids busy while waiting for Mom's attention, or math centers for school!

BTW - if you like pattern blocks - check out her exclusive 4Blocks puzzles (kind of like a pattern blocks relative).

These school supply pattern block designs are available here and on sale for $2.00 right now!


This unit fit right into our theme for the week, and I loved the activities included!  We haven't even had time to finish everything yet - lots of great stuff inside!  :)

This packet is available here.

And yet another fun item!  A FREE math journal based on "The Very Hungry Caterpillar" - sooo cute!  
This one is available here.

And there you have it folks!  Our new school room and some exciting back-to-school moments!  Hope you enjoyed it all and have left with some inspiration of your own for making this new school year a memorable one!  :)


 Linking up to:
www.cornerstoneconfessions.com
http://nextgenhomeschool.com/
www.gingersnapcrafts.com
www.cleanandscentsible.com
www.ithappensinablink.com
www.houseofhepworths.com
www.sunscholars.com
http://www.cheeriosandlattes.com/
www.hiphomeschoolmoms.com
www.tatertotsandjello.com